Banks Crash Pad Installation
Michael Hilt
Europa TCS 73023076R
I don’t think there is any way to change the crash pad without removal of the windshield. The long defroster bezel screws can’t be removed and reset in their original holes, nor can the pad front be properly trimmed without full access. And, as old as these cars are, you may never know what the factory or previous owner have left in store for you…as I found out.
Preparation
My windshield trim is not stock - installed by Steve Smith of TwinCam Sports Cars of Sarasota, FL. If you look at a close-up my car in the photos section of the Yahoo Gallery (http://www.lotuseuropa.org/gallery/view_photo.php?set_albumName=hiltm&id=Manchester_Spring_2005), you can see the trim detail. I think it looks a lot cleaner than stock (oh, and the DPO had lost a piece).
I can’t comment on the windshield and trim removal as described in the manual. Since the windshield is ‘directly bonded’ to the body, all I had to do was dig out the excess butyl and RTV from the last windshield install. I fashioned a small ‘L’ shaped cutting tool from some stainless I had lying around, and using vice grips, worked it between the butyl and glass, steadily breaking the seal. After a while I just lifted with steady pressure and cut the sticky butyl strands as I lifted and it slowly came out. No threat of breaking.
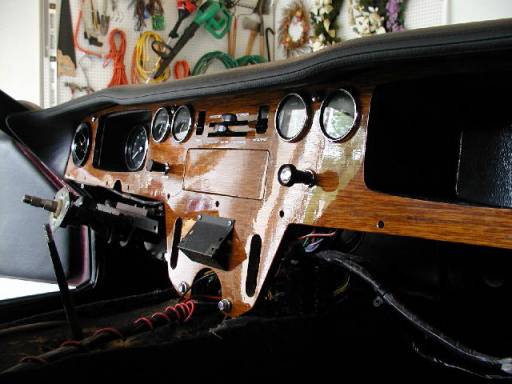
I then removed the center console and the steering wheel and its cover for access to the dash board.
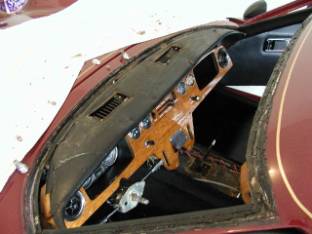
Step 1) Glass out, remove mountings
The pad is secured with the bezels and four upper mount screws
Remove two lower bolts Remove four upper mount screws Bezels removed
![]()
![]()


![]()
![]()
![]()
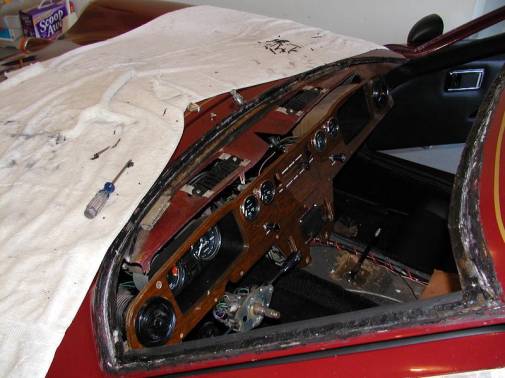
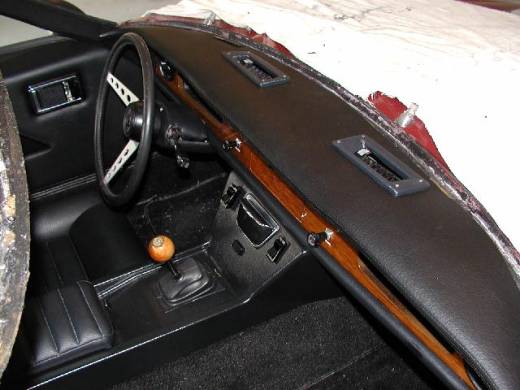
2) Crash Pad removed. Remaining screws removed and dash pulled back.
I pulled the rest of the screws holding the lower trim
and removed to reupholster. Remove the brace bolts (2 per side) And
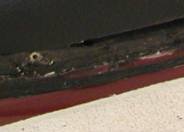
the remaining bolt for the steering column Note poor condition of mount tabs. 3rd one is
totally missing!

![]()


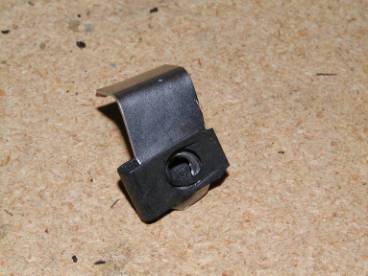
3) To ensure a firm mount when I reinstalled, I fashioned 4 ‘L’ shaped tabs from stainless steel, drilled a 3/8" hole in each and fitted a 1/4x20 threaded panel fastener to each. (Reduced the pain of getting in there with a fender washer, nut and lock washer, let alone a wrench to tighten!). They must be fairly narrow to fit between the gauges.
I snipped off the fiberglass tabs and secured the new tabs to the dash. I then fitted the dash back in place and pop riveted the brackets to the cowl. It resulted in perfect alignment.
Top View with pad out and dash pulled back. Bezels mount thru these aluminum strips
![]()


Close-up of the dash securing tabs I fashioned. Measures 1 inch from bend to hole center. I don’t know why Lotus didn’t just machine one long
aluminum strip containing all 4 mounting points to be pop riveted in
place. Sure beats depending on
fiberglass.


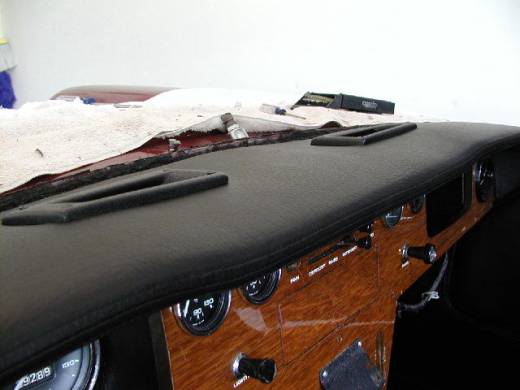
4) Detail of the trimming required for the crash pad
I used a Dremel tool to remove excess fiberglass (Used
old pad as the template here) I had to take a lot more off in the area around the
glove box (shown untrimmed here). I
probably spent two hours just trimming and test fitting alone.


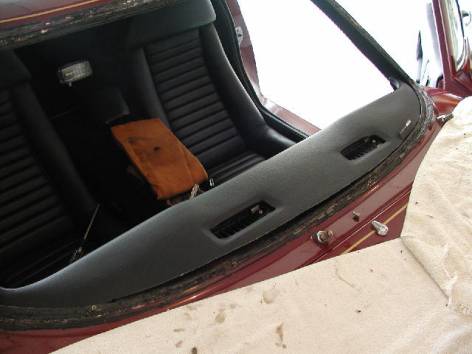
5) Test fitting new pad. It must be inserted from the inside and below – a learned technique.
A notch must be cut at this point on each side to allow
it to snug up and the ends to fit under the cowl. But outside the notch,
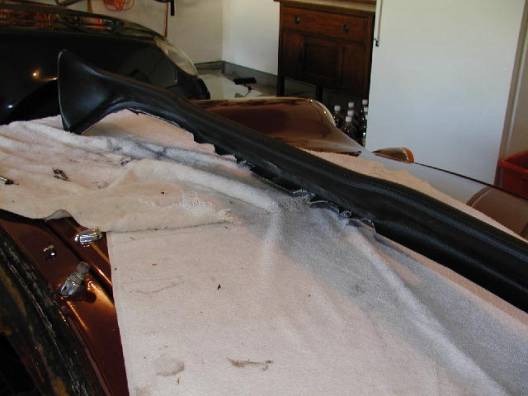
virtually no trimming was required. I’ve tried to emulate the notch shape here… I’ve taken about 3 inches off so far. Working on both the forward edge and the
defrost vents. My car had a rolled, sewn ‘bead’ inserted along this
edge to cover any trim errors. I
had my wife fashion one and I installed along this edge after the glass was
in. Nice feature of new pad. It rolls under cowl at this
point for a real nice fit around the corner
![]()
![]()


![]()
![]()
![]()
![]()
 6) I fitted the pad, then slid the
dash forward and up, checking the fit until I could insert the two lower bolts. Then inserted the 4 upper bolts to the new
mounting tabs. This photo shows all the mount bolts started.
6) I fitted the pad, then slid the
dash forward and up, checking the fit until I could insert the two lower bolts. Then inserted the 4 upper bolts to the new
mounting tabs. This photo shows all the mount bolts started.
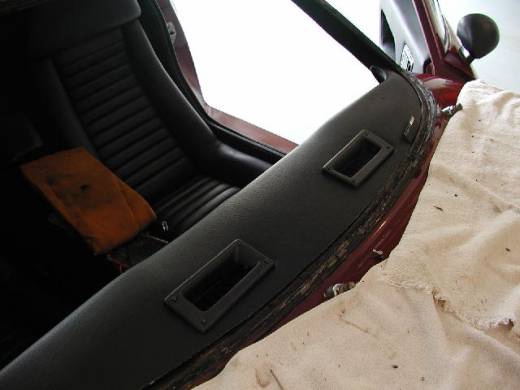
Be sure to check the fit around the vents. Too large a
flange will catch on the back of the vent, not allowing the dash to fit
into the corner. Took an hour of
‘fit/measure/remove/trim’ to get it right Be careful of fit around top of glove box
![]()
![]()
Fitted new bezels, be sure NOT to hide your VIN plate. The bezels are the only points holding
the front of the pad down.
![]()
![]()
7) Bezel fit detail. If trimmed correctly the bezel mount screws will fit into the corners of the pre-cut pad opening and align with the pre-existing holes in the aluminum mounts. My bezel screws were 21/2 inches long, so had plenty of reach to catch the mounts. Because they were so long, there was no way I could remove and replace without removing the windshield.
I like the nice look of the stitching along the front.
8) Installed newly upholstered lower pad, reattached lower corner brace bolts, then refitted console and wheel.
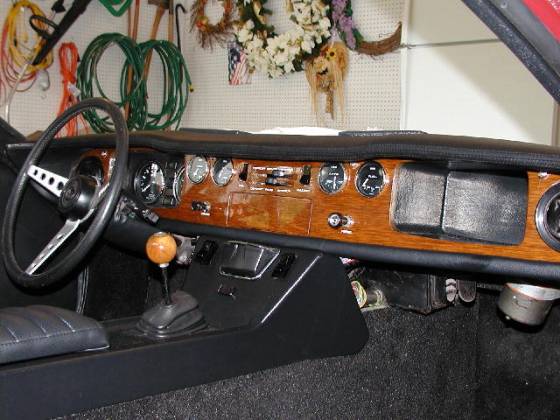
9) Ready for glass refit. Total time about 8 hours and a couple of beers!
10) Windshield reinstall. I cleaned the glass with a 3M cleaner and prepped with a commercial glass primer. Older installations don’t have the black UV protection around the screen to prevent the butyl from breaking down and leaking, so a primer must be used (it’s an MEK-based cleaner). Obtained from an auto glass shop.
I installed 3M’s Window WeldTM Ribbon Sealer (Pt. No. 051135 08612) 3/8” X 15’ butyl strip obtained from my local auto parts store and fitted it in the body recess. It has window-setting directions on the box. My wife and I set the glass in place, bottom edge first, ensuring it was centered on both sides and resting nicely on the supplied blocks. Used firm hand pressure to make sure the sealant contacted all around the glass (Watch the bead spread as you view from thru the glass and apply firm pressure). Next, I laid in a layer of Trojan 660 urethane between the glass and body as recommended by the auto glass shop, and used the urethane to reattach the molding strips. I used masking tape to hold the strips in place and cleaned up with 3M adhesive cleaner. Waited four hours and had another beer. Installed the wiper arms. Washed and test-drove the next day.
NO Leaks, Ops Check SAT!