In June 2006, my brake pedal on my 1974 Europa started to feel different. Upon initial application of the brake it was fine, but near when the car came to a stop, it seemed soft. I drove the car like this for several months, but was aware something wasn’t right. Having never experience this before, I wasn’t sure what it was. I started looking around the car for obvious leaks or something wrong, but didn’t find anything. So, I kept driving it….
A few months later, I decided that something really needed to be done, because the pedal now slowly went to the floor during each stop. My first course of action was to remove the boosters. I don’t understand why they were put on these cars to begin with, so off they came, and on went a pair of short lines to bypass them. I bleed the system, and went for a test drive… No change, the pedal still felt squishy and slowly went to the floor. I was reasonably sure the front calipers were good, because I had replaced them back in 2005. This left the rear wheel cylinders, and master cylinder as possible causes of my problem. The interesting thing was, I wasn’t loosing any fluid, which really perplexed me. Anyway, as a matter of course, I replaced the rear wheel cylinders and re-bleed…. No improvement.
It was now time to look at the dreaded master cylinder. I bought a rebuild kit for it, and meticulously installed it. I was very careful to keep everything clean and in order. Once complete, I bench bleed it, and re-installed it in the car, then re-bleed the entire system. I should have bought stock in Castrol, as I’ve spent a lot on brake fluid at this point. I was very excited about the test drive, because I was sure this would solve my problem. Well, to put it mildly I was disappointed, but I was tired of dealing with it, so I drove the car for a few more months like this until I felt like attacking it again.
February 2007, and I was ready to try again. During the break, I had decided that it was definitely a master cylinder problem, and I was not going to attempt another rebuild, nor was I going to buy a rebuilt one from somewhere. I looked at some of the postings regarding various swaps, but wasn’t happy with the adapters, and weird short bends required to adapt other OEM master cylinders to the Europa. I researched new replacement master cylinders and racing master cylinders that were on the market. I’d seen many Tilton units installed on race cars over the years, so a paid the Tilton site a visit. I went through their offerings and found a neat little universal master cylinder kit that was available in a 5/8” bore size, which was smaller than the original M/C and perfect as a replacement considering I had removed my boosters and need more pressure from the master cylinder. The site showed all the relevant dimensions of the Tilton unit, and it was so complete, I couldn’t believe my eyes. At that point I was sold, even without knowing the price. I searched the internet for a Tilton dealer and found that one of my old favorite Hot Rod shops (Jegs.com) sold them. (I’ve flirted with Muscle cars on and off over the years…) I was floored when I saw that they were selling them for $69.99 (Jegs part number 454-74-625U). So, I ordered one up, and knowing that it was a single piston unit, I would now need to reduce the pressure to the rears, I also ordered a Jegs proportioning valve for $37.99, (Jegs part number 555-63020).
As a side note, the Tilton is called a series “74” universal master cylinder, which is ironic, because I’m installing on a Lotus 74.
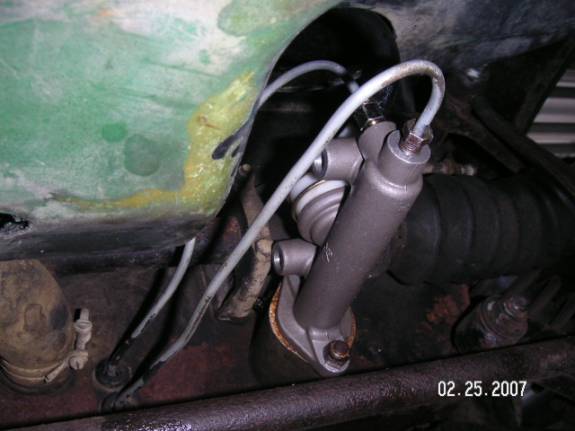
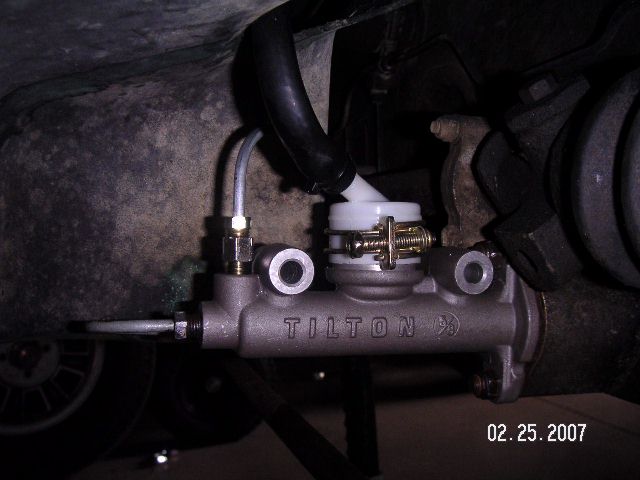
So, I have about $110 invested in parts for the conversion. I had anticipated that I would need all kinds of adapters to make it work, and was prepared to spend some money with Pegasus racing to make it work. But I didn’t need to. The picture below shows the installed unit from underneath the car. The line coming out of the front of the M/C is the rear brake feed, the one out the top is the front brake feed. Both lines are the original Lotus lines, that I’ve re-bent to arrive at the ports. The line for the rears just screws right in. However, the line for the fronts needs to be re-made with a 3/8-24 fitting on the end. I only have the tools to put a standard flare on the line, not a bubble flare as originally on the car. Not to worry, the Tilton comes with a suitable adapter!!
Note on the picture above, that the mounting holes on the Tilton are a perfect match for the Europa. The rod that links the pedal to the M/C needs to be moved from the original M/C to the Tilton… No big deal there, as it’s a direct fit.
The picture below is from the wheel well, and it gives a better view of the adapter used on the front brake line.
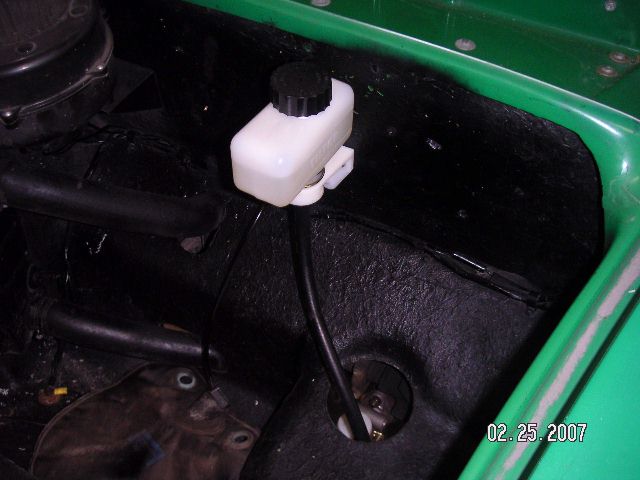
The Tilton kit comes with two reservoirs, plus a remote mounting kit. I chose to mount the large reservoir remotely because it fouled the steering rack when installed directly on the M/C. Picture below.
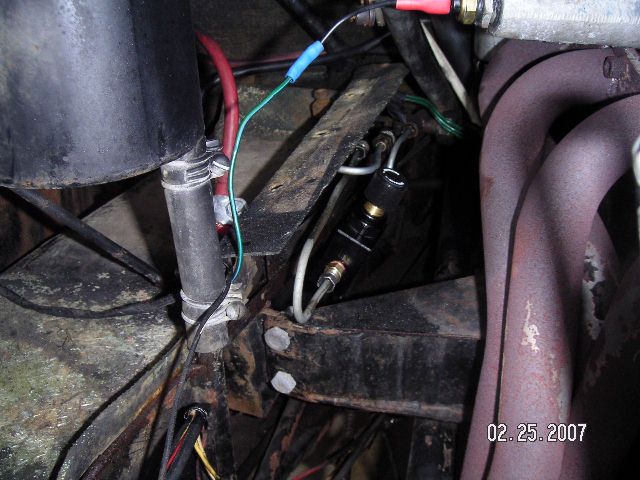
I installed the proportioning valve inline where the rear booster used to go. This made for nice un-complicated lines at the master cylinder, and easy access in the engine compartment. I had originally considered installing the proportioning valve up front by the M/C but I like things simple, so I put it where it is. This picture below shows the proportioning valve installed. It’s the small black box with the black knob just to the left of the header.
Summary:
To do this swap, takes patience, and a delicate touch re-bending brake lines. Plus, it’s handy to have kept the lines that fed your boosters if you have removed them. I am very happy with the brakes now. The pedal is solid, and the car stops well. Going from a ľ” diameter master cylinder to a 5/8” unit means there will be more pedal travel to move the same amount of fluid (Fluid dynamics 101). However, this is a small price to pay for a simplified brake system, with no boosters!!
Anyone with questions, please feel free to email me. Also, please see my Stromberg to Weber DGV conversion article. Still running the Weber, and love it!!
David Maughan – thefinite1@gmail.com