Replacing The Transmission Differential Nut Seals
By: Eric Ward
Some Progress on the axle nut saga! I received the tool from George and a new nut from Peter. Thanks guys. This morning I made another attempt at the nut. I found that the 18 slot tool kept popping off. I decided to give it another try with the six tang tool. The nut had been receiving Kroil every few days for
several weeks now. I decided to apply some heat again. I am too paranoid to use the oxy-acetylene torch on aluminum, so I used the little mapp gas torch. This time, it turned! I have the right side nut off. The left one turned when I tried it a few weeks back, but I haven't removed it yet.
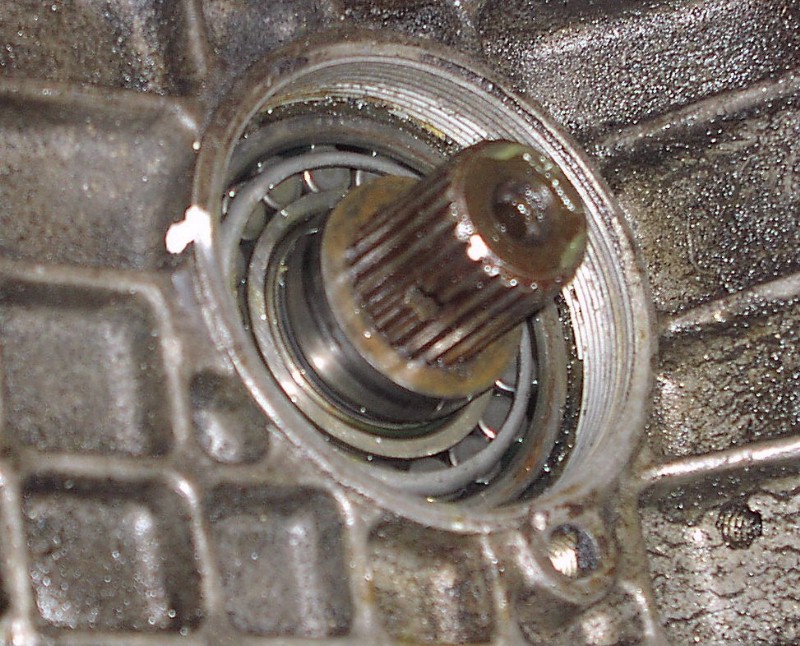
View with the nut and seal removed. The big diameter ring on the shaft below is the seal land. The o-ring is hidden behind it. You can㦙 twist it off because it is splined to the output shaft. I pried it off with two medium size screwdrivers 180 degrees apart.
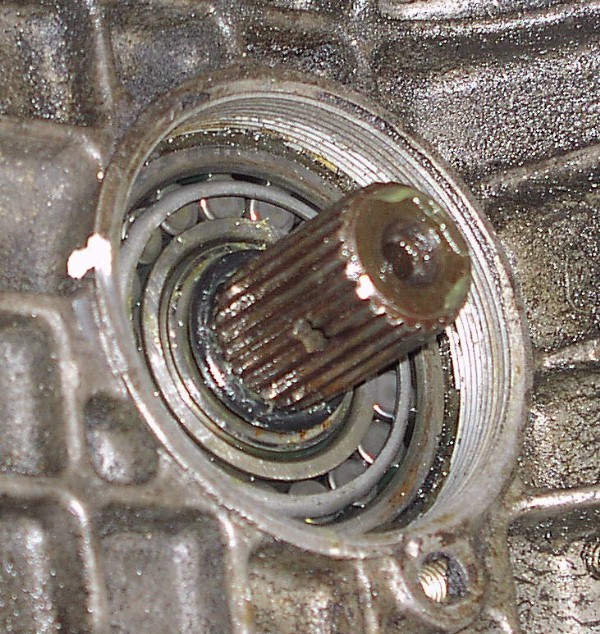
Same view with the seal land removed. The o-ring can be seen at the base of the shaft. I got the old o-ring out by wedging a small screwdriver under it, peeling it up a bit, and then getting in a larger screwdriver. This poking may damage the seal, but I am replacing it anyway.
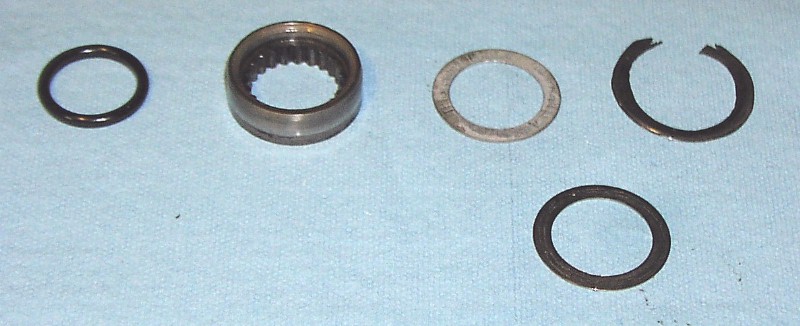
Left to right. The o-ring, the seal land, shims. The seal land is shown with the inboard side facing up. Note the big chamfer on the ID. This provides space for the o-ring. There is no chamfer on the outboard side (see picture 1), so care must be taken to put it in the right way. My car had no shims on the right side and two on the left. They were stuck onto the seal land. Since the thin one was broken, I got one the same thickness as the other two combined to replace them with

The special tools I used. The tool in back is to tap out the drive shaft roll pins. I made it from a ratchet extension bar. The other two were for getting off the nut. Left front is Performance Tool W1270 (13 bucks at local auto part store). Front right is home made tool borrowed from George. I had a hard time using the 18-slot tool because it kept popping off. If I had an assistant to hold it in position I think it would have worked well. I managed to get the nuts off using the W1270 tool, Kroil, and heat from the mapp gas torch.
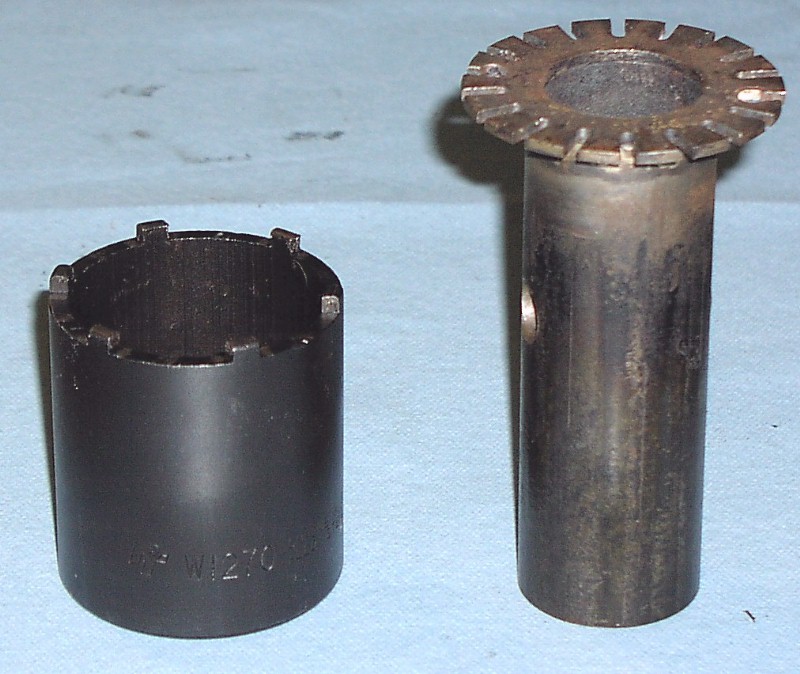
Other views of the tools. Note that the W1270 has a square drive for a half inch ratchet handle or breaker bar. The other tool has a hole to stick a bar through. Since it has 18 positions, only one hole is needed.
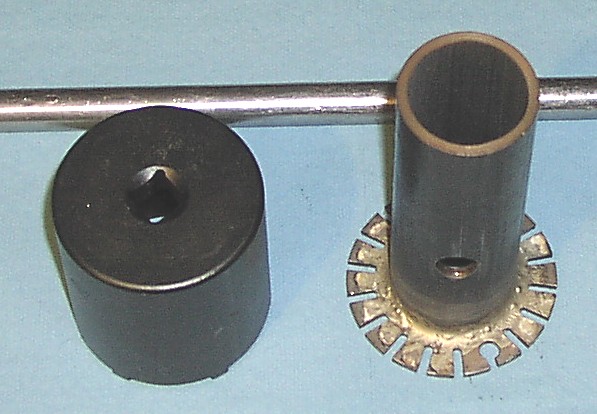
Other views of the tools. Note that the W1270 has a square drive for a half inch ratchet handle or breaker bar. The other tool has a hole to stick a bar through. Since it has 18 positions, only one hole is needed.

Pressing the old seal out of the nut. In the center is the nut, you can see the threads on the OD and the wrenching tabs. On the right is a 1 1/2 inch socket (purchased for removing the rear hub nuts). It's just the right diameter to press out the seal. The seal could only be press a little bit before it bottomed out against a piece of wood that was supporting it (not shown), but I found that the nut nestled perfectly in a BMW 2002 CV joint (the black thing on the left). That provided the clearance to press the seal all the way out.
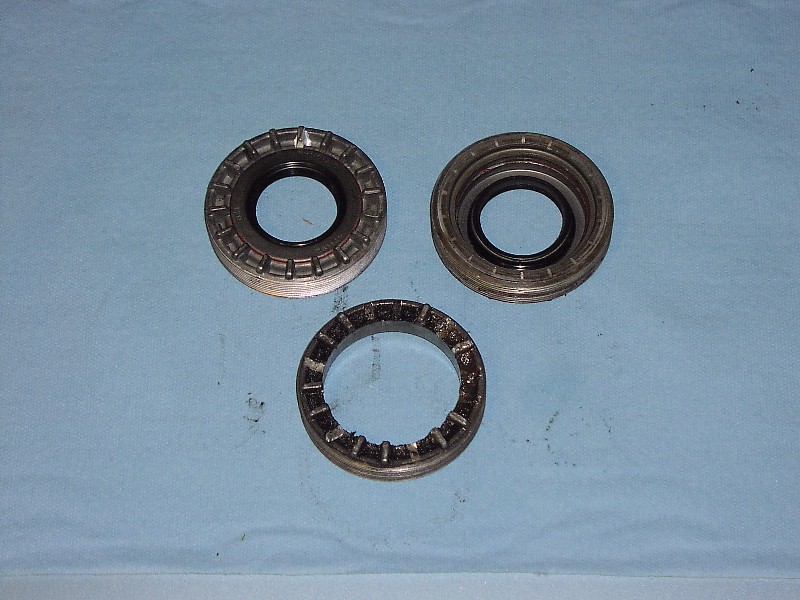
The nuts with the new seals installed. Top left shows the outboard side, top right shows the inboard side. The bottom nut is the old one with eight tabs broken off and the seal removed.
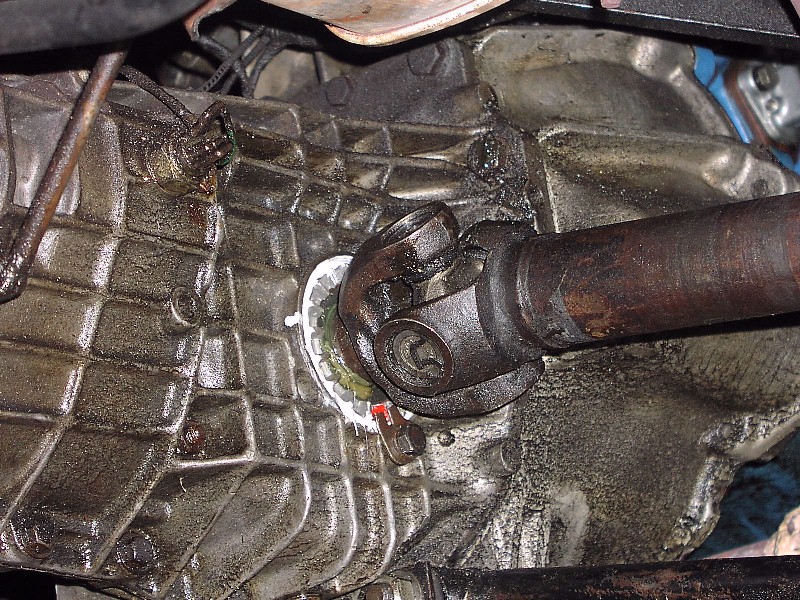
The reassembled joint. The white stuff is the Teflon thread sealer. The yellowish stuff is grease. Just where the yolk disappears into the nut, the end is brighter than the rest. The seal's outer lip is probably suppose to be running on that surface, but I'm not sure. I have it so that both lips are running on the seal land. That may be wrong, but I am not going to take it apart again.