The Lotus Europa Twin Cam Shifter Challenge
(Mirror from http://members.cox.net/lotuseuropa)One of the most frustrating areas on the Europa is the gear shift linkage.
It is far from precise (or quick) due in part to its complexity. With wear from
use, it only gets worse. The animated images below show my 1974 Lotus Europa
shifter going through the motions in neutral. Notice the extreme range of
travel at the shift lever. Shifting this car was like stiring a bowl of pudding
on the stove. I had to believe Lotus did better than this. My efforts here are
to restore the shift system to original quality. Many others have chosen to
abandon the factory parts for a different approach. Depending on how things go,
I may join them.
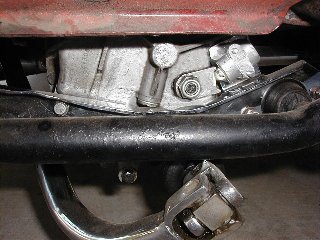
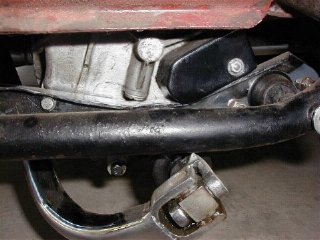
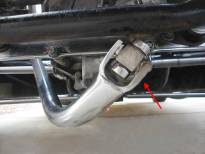
After pondering this system, I noticed the little object pointed to in the picture
below. I wondered why it was there doing nothing productive. This, I found out
is part of the reverse and 5th gear detent. I was missing the rest of the
parts.
I ordered the parts I needed from DBE
and installed as below. This improved the feel of the shifter. At least there
wasn't quite as much sideways motion and I was protected from unknowingly going
into reverse. The black plastic cover keeps things clean.
Notice check ball and
housing
Notice black plastic
cover
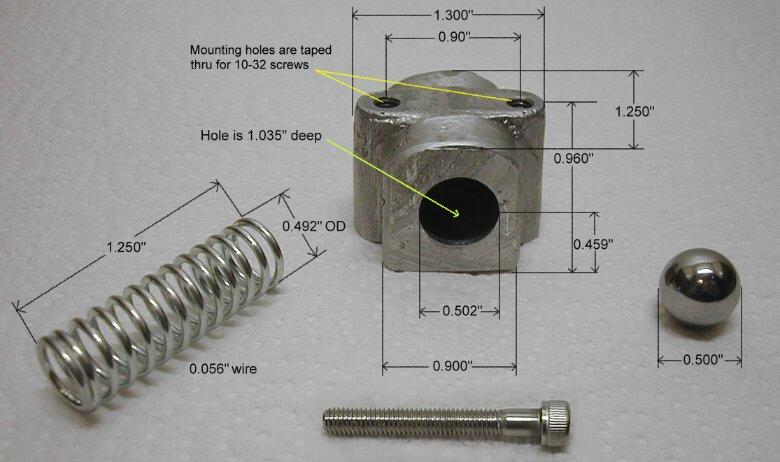
If you need these parts and can't find them from any of the Lotus parts
suppliers, check the parts
dimension information and make it yourself. Materials are not critical.
The plunger block is aluminum. The ball is hardened steel. These materials
should be available from a good hardware store. Don't use too stiff a spring or
you will have problems installing the ball and the force needed to go into
reverse or fifth gear will be excessive. The spring I ended up using was
obtained from a local ACE Hardware store. I had to cut about 1/4" off of
it. The ball should not be so tight a fit in the housing that it binds or
compresses air behind it. This would in effect increase the effective force on
the ball making it more difficult to shift into reverse or fifth gear. Expect
to spend a little time adjusting the position of this assembly in order to get
reverse and fifth gear "timed" right.
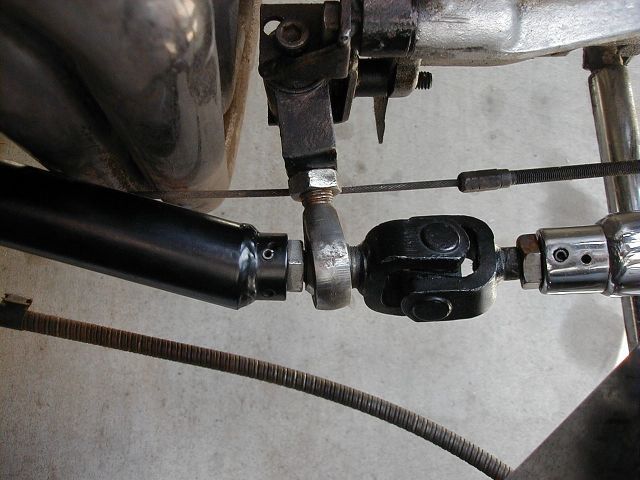
Next I noticed some slop in the shift linkage universal joint area. The
rubber bushing was shot. It was very soft and allowed for lots of extra motion.
I replaced it with a new one from DBE.
![]()
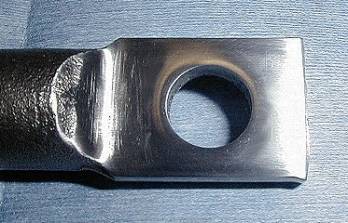
I found moderate side play in the u-joint. The roll pins were in but the
threaded ends wobbled in the link tubes. I removed the universal joint and
found that the roll pin holes were abused ![]() in
the past. I repositioned the u-joint threaded shafts in the link tubes with new
roll pins and holes. I also added a couple of jam nuts to help hold things
extra tight. Note that the threads on the back half of the universal joint are
reversed.
in
the past. I repositioned the u-joint threaded shafts in the link tubes with new
roll pins and holes. I also added a couple of jam nuts to help hold things
extra tight. Note that the threads on the back half of the universal joint are
reversed.
Click picture to see
close up
Going further forward, I found that the shift lever fulcrum was another
problem area. There are supposed to be two nylon bushings on the bolt. Mine
were gone. The result is more slop as can be seen in the following animations.
To determine if your bushings are worn, place the trans in neutral and have
someone hold the shift lever. Try to rotate the link tube near the u-joint. If
the bushings are gone (like mine were), expect at least 10 to 14 degrees of
rotation and 1 3/4 inches of lateral play at the shift knob.
I got the new bushings from R.D.
Enterprises and installed them. As you can see, no slop! I'm hoping for
a much improved shifter.
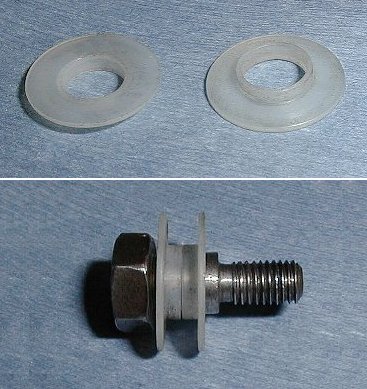
Click on picture to
see the parts
While I was working on the shifter, I decided that a little polishing and
de-burring of the surfaces that contact the bushings might help them last a
little longer. It might also make for a smother action. Polishing was done with
good old 3M Wetordry paper (grades 220 through 600) and two fingers. Even if it
doesn't help, I like the look of polished metal.
|
|
|
|
One side before
polishing |
Other side after
polishing |

The only way to access the shifter bolt to replace the two nylon spacers is to
disconnect the shifter tube at the point where the u-joint and bushing attach
at the side of the bell housing and pull it out. At least that's how I did
mine. This means you also have to remove the 4 bolts that hold the shifter to
the tunnel so that it can drop down and free. If you do all of that, you can
just pull the tube back enough to get access through the tunnel access hole. I
removed the whole tube/shifter assembly from my car to do the work. It isn't
that difficult to remove. I had the tube and the shift lever powder coated
while it was out.
To reinstall, just slide the assembled shifter/tube back into the chassis
and feed up through the shifter mounting hole. If the shift lever flops around
too much, just temporarily wrap it with a bit of duct tape to keep it straight.
Re-attach the u-joint and bushing and you should be close to having a decent
shifting Europa. If you skip the powder coating (2 day wait for me), the job
shouldn't take much more that 2 or 3 hours. You may have to play a bit with the
shifter shoulder bolt and nut to get the right tension. Too much and it will be
too stiff. Too little and it may come apart or be sloppy.
After all of the above repairs were made, I'm happy to report that I can
successfully shift my Europa to any gear I want, when I want, without fail. No,
it's not the slickest shifter I've ever driven. But it is now reliable. It
doesn't have the spring loading effect of a Hurst Competition shifter so you
have to consciously move the lever over to the 3-4 shift zone. At least I now
know I'm in that zone.
For some time, I've been living with a leak in my shifter shaft seal. No
more. I ordered a new seal and installed it in about an hour.
Remove the roll pin holding the shifter and pull it off the shaft.
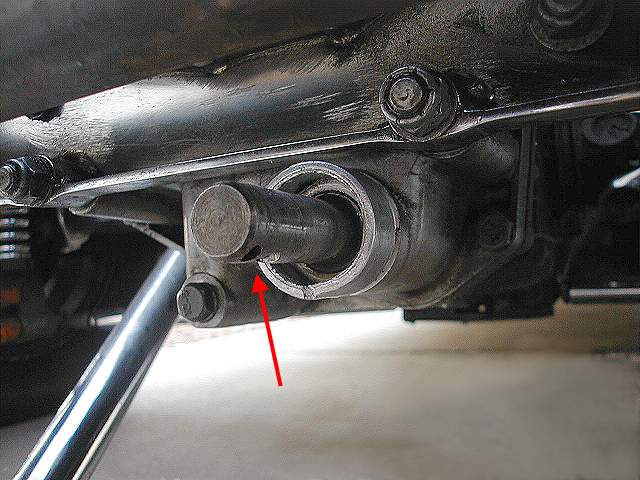
Here is the bare shaft with the arrow pointing to the roll pin hole. Notice
that the old seal has already been removed.
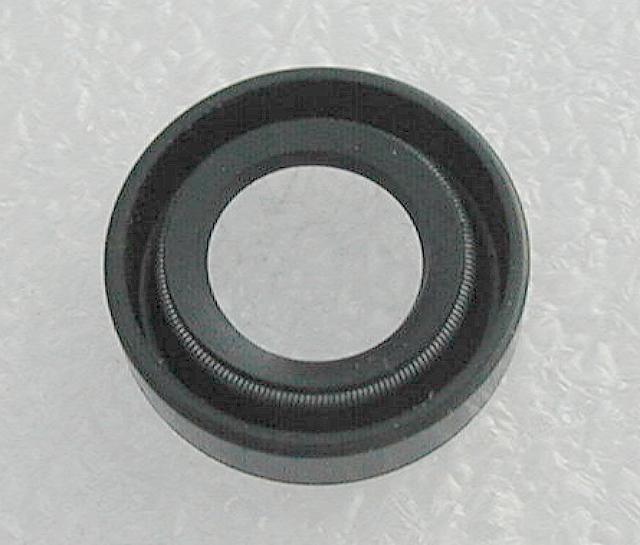
Here is the new seal. Orient it properly.

Lightly oil the shaft and the lip of the seal and slide it to the transmission.
I used a socket to press it into the trans.
Last update: 29 Apr. 2002