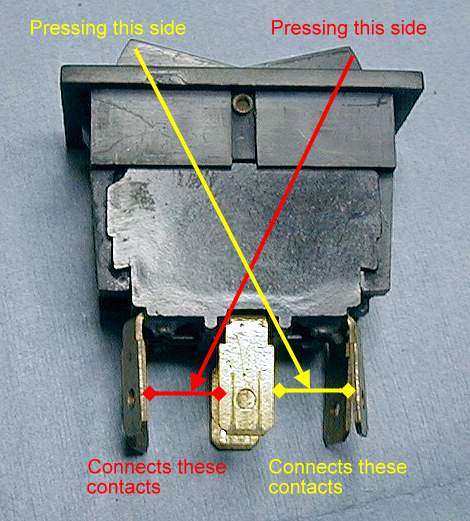
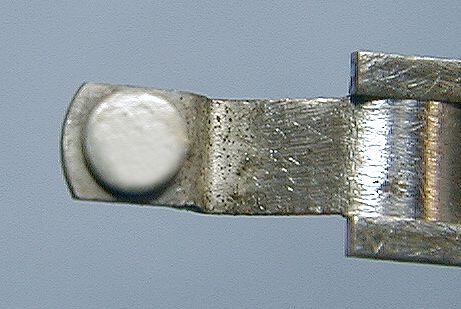
Figure 1
The rocker switches that control my electric windows didn't. By that, I mean they didn't work or they worked only occasionally. Although I believe replacement switches are available, I had nothing to lose so I decided to take the switch apart and find out what the problem was. As the switches control a fair amount of current, I suspected that the condition of the internal contacts was the problem. I was right. I also found out that I could rebuild them. Here is how I did it. Pardon some of my camera work. The camera I have is not able to focus as close as I need.
The image in Figure 1 is a side view of the switch removed from the car. It is a DPDT-NO (Double Pole Double Throw rocker switch with Normally Open contacts and center off). The lugs in the center are the poles and are connected to +12 volts. The outer contacts are connected to the window motors. One contact delivers power to raise the window and the other to lower it. The figure describes the operation.
The first thing we need to do is carefully open the switch so we can clean its internal parts. I did this by first carefully prying one side as shown in Figure 2. Care is needed because if too much force is applied, the side catch may break. If this happens, it's time to stop and buy a replacement switch.
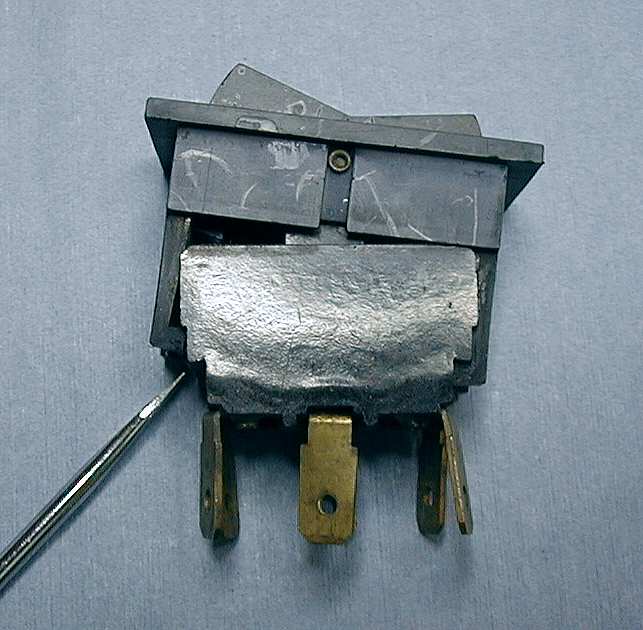
Once you have one side loose as in Figure 2, pry the other side as in Figure 3.
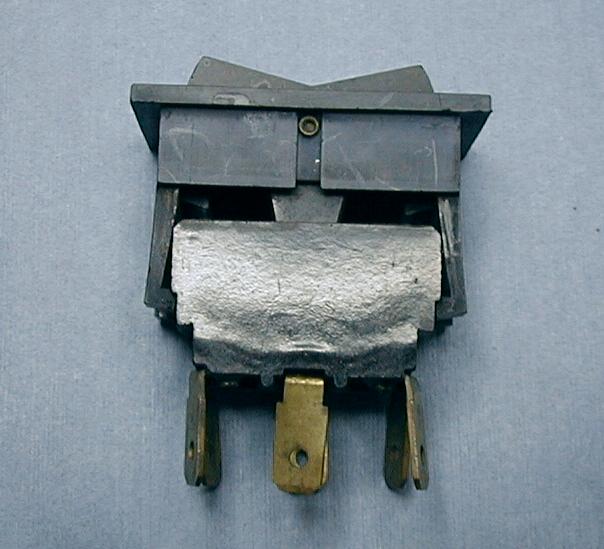
Then carefully slide the top half of the switch away from the body as in Figure 4.
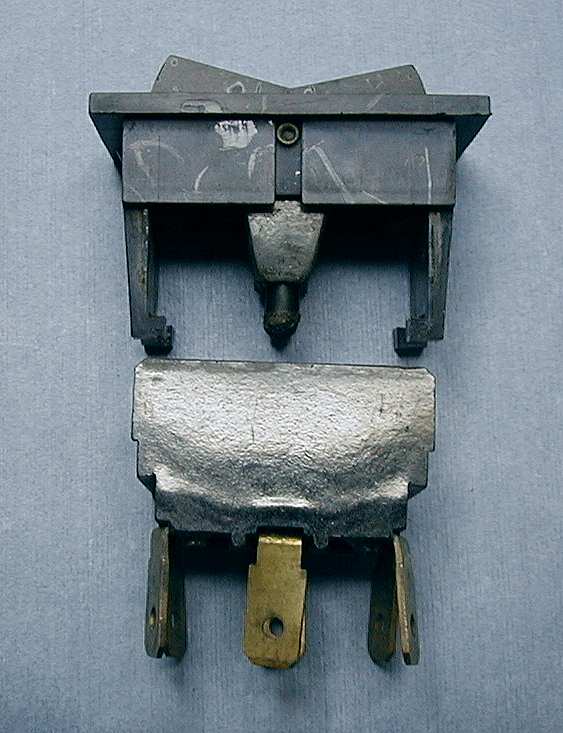
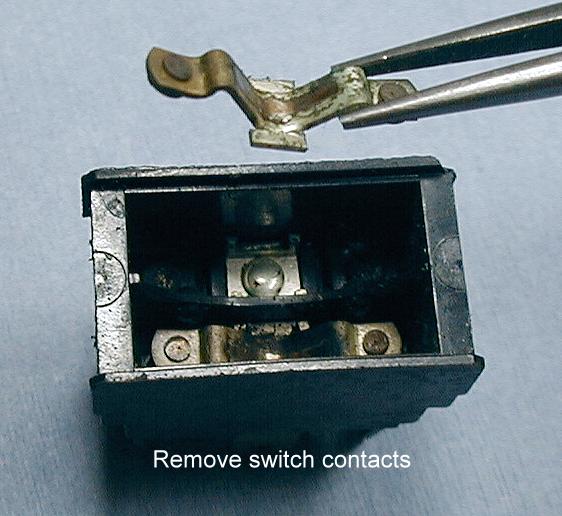
Now that the switch is apart, let's look inside in Figure 5. Those metal objects inside are the contact arms. The actual conacts are at the ends.
Remove the arms. Use tweezers or needle nose pliers or simply tip the switch over and dump them out. Nothing is holding them in. See Figure 6.
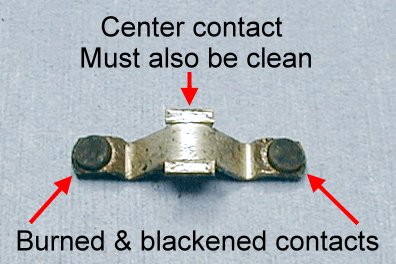
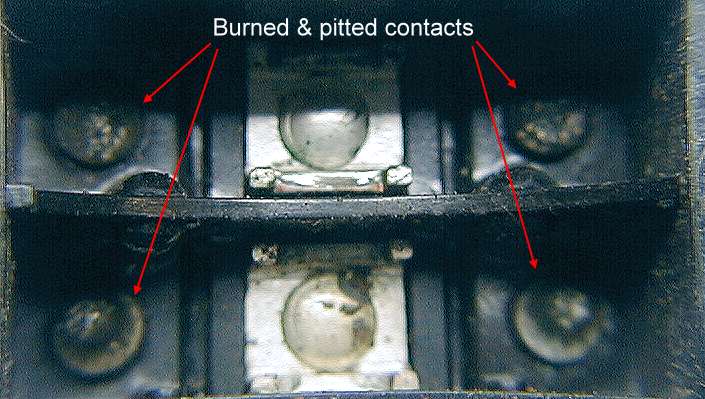
The contacts are shown in Figure 7. Note that they are black and rough or pitted. In a new switch, they would look smooth and shiny.
Using a combination of whetstone and carborundom papers (400 to 3000 grit), I was able to restore the contacts to a good condition as shown in Figure 8. It is improtant to keep the surface of the contact slightly curved so that it interfaces to the internal flat contacts properly. It is also important to get the contact surface as smooth as possible. Any roughness will allow premature burning of their surfaces.
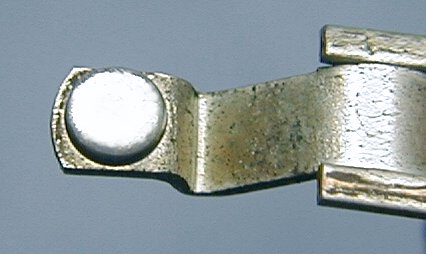
After I had the contacts resurfaced the way I wanted them, I decided it would be good/fun to silver plate them. Silver is an excellent electrical conductor (better than copper). The plated contact is shown in Figure 9. It doesn't look too much different but it should conduct a bit better.
There are corresponding contacts inside the switch body that also need attention. These are shown in Figure 10. I attacked these contacts with a round polishing tip on a Dremel tool. These contacts are relatively flat - no arc is required. After they were polished, I silver plated them.
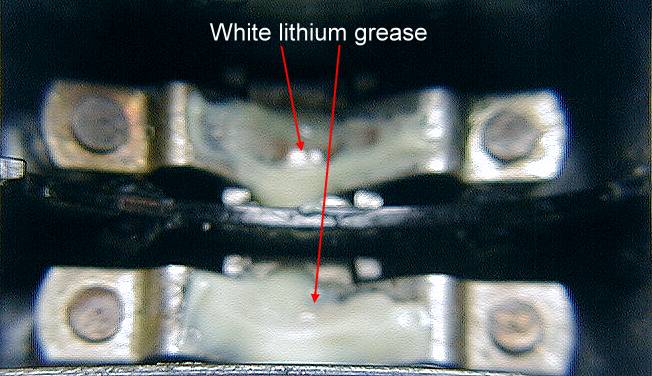
Once all the contacts are finished, you can clean and re-assemble the switch. Place a small amount of white lithium grease on the curved back of the contact arms as shown in Figure 11. This grease is obtainable from any good auto parts store. It comes in a small tube (like toohpaste).
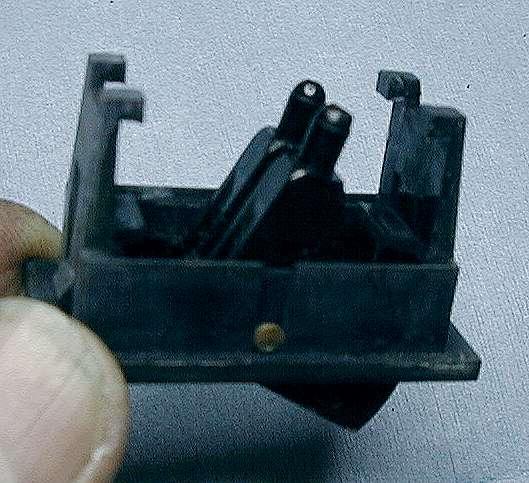
Place the cleaned switch top over the switch body. Hold the rocker in the center position and slide the top down onto the body. Engage one side and then the other until they latch into position. If you don't hold the rocker in the center position, the switch might end up in an unmoveable condition (how do I know this?). Note that there are two spring loaded plastic plungers in the the top half of the switch as shown in Figure 12. Don't loose them or the springs. They are needed to apply the moving force to the contact arms.
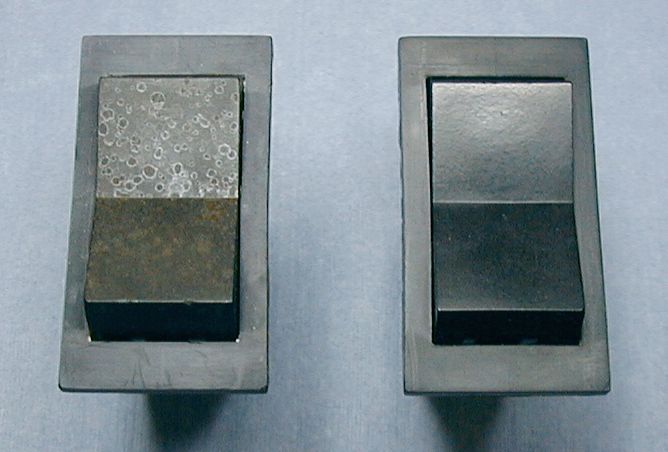
If all went well, you have the equivelant of a new switch. Well almost. My switches looked kind of shabby. The surface was dull and whiteish. Using a product called Novus #2 Fine Scratch Remover see note, I was able to improve the appearance of the switch. The before and after views can be seen in Figure 13. Reinstall the switch in your Europa and crank those windows. With reasonable use, they should last a long time. However, if you want them to really last a long long time, consider building a relay interface. Using relays, the switches handle relatively small currents so they should last longer that the car. Info on how to do this will be in a future installment.
Novus
Novus is used primarily as a scratch
remover and polisher for plastics. I got mine from Antique Electronic Supply in Tempe,
Arizona. The 2oz bottle of #2 costs $2.50. If you go to their website and put
novus in the search box, it will take you to the page describing Novus products.
You can also visit the Novus Co.
website.
Last update: 24 Apr. 2003